Watch my directed drawing video on how to make a easy cartoon tree drawing
Today I let’s see if we can draw something most of see every day but can sometimes be a little bit tricky to draw – a tree 🌳! In this easy directed drawing I’d like to show you a fun way to make the branches look like they are sticking up into the leaves using a simple overlapping technique. I tried to make today’s directed drawing tutorial easy enough for children in preschool and kindergarten, as well as for older kids and adults just getting started with directed drawing. Have fun! 🥳 – Patrick O.
Follow these directed drawing instructions that make a cartoon tree drawing easy to do:
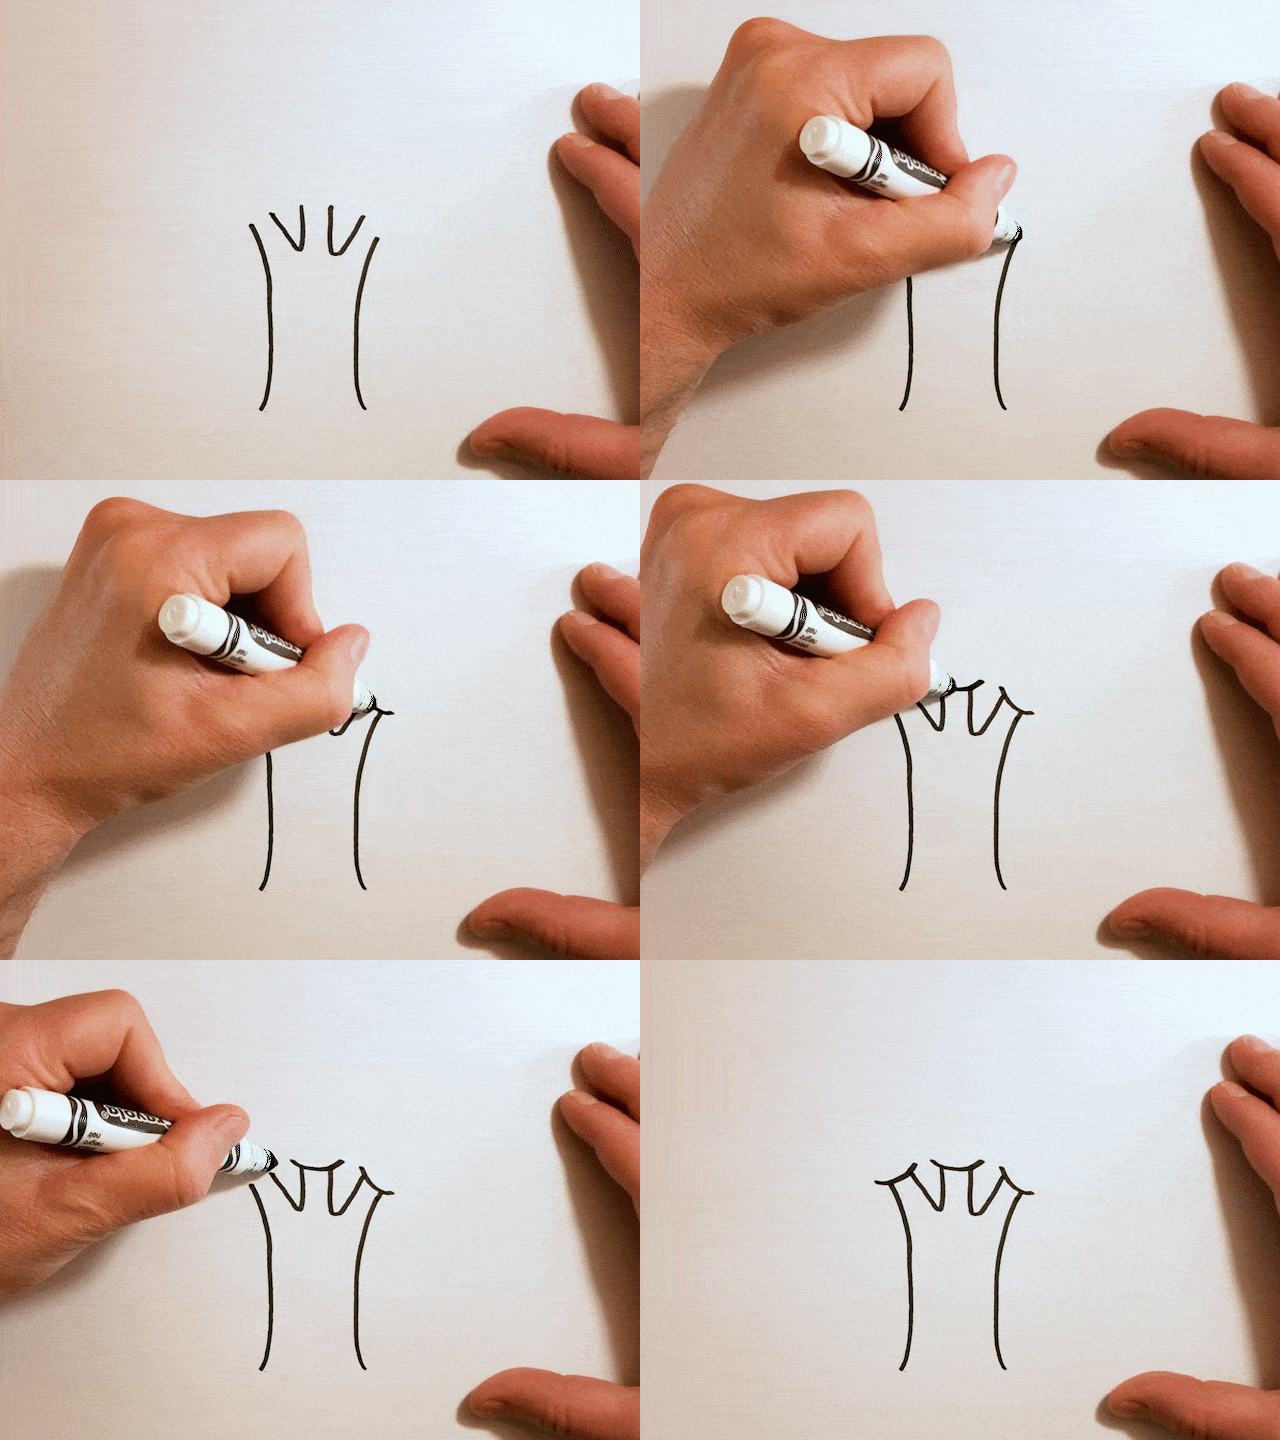
- Start by drawing the cartoon tree’s trunk. Draw two vertical lines up. In between the tops of the lines draw two smaller V-shaped lines to separate the tree’s branches.
- Next draw the bottom leaves. Draw curved lines above each of the three branches to indicate where the branches disappear into the leaves.
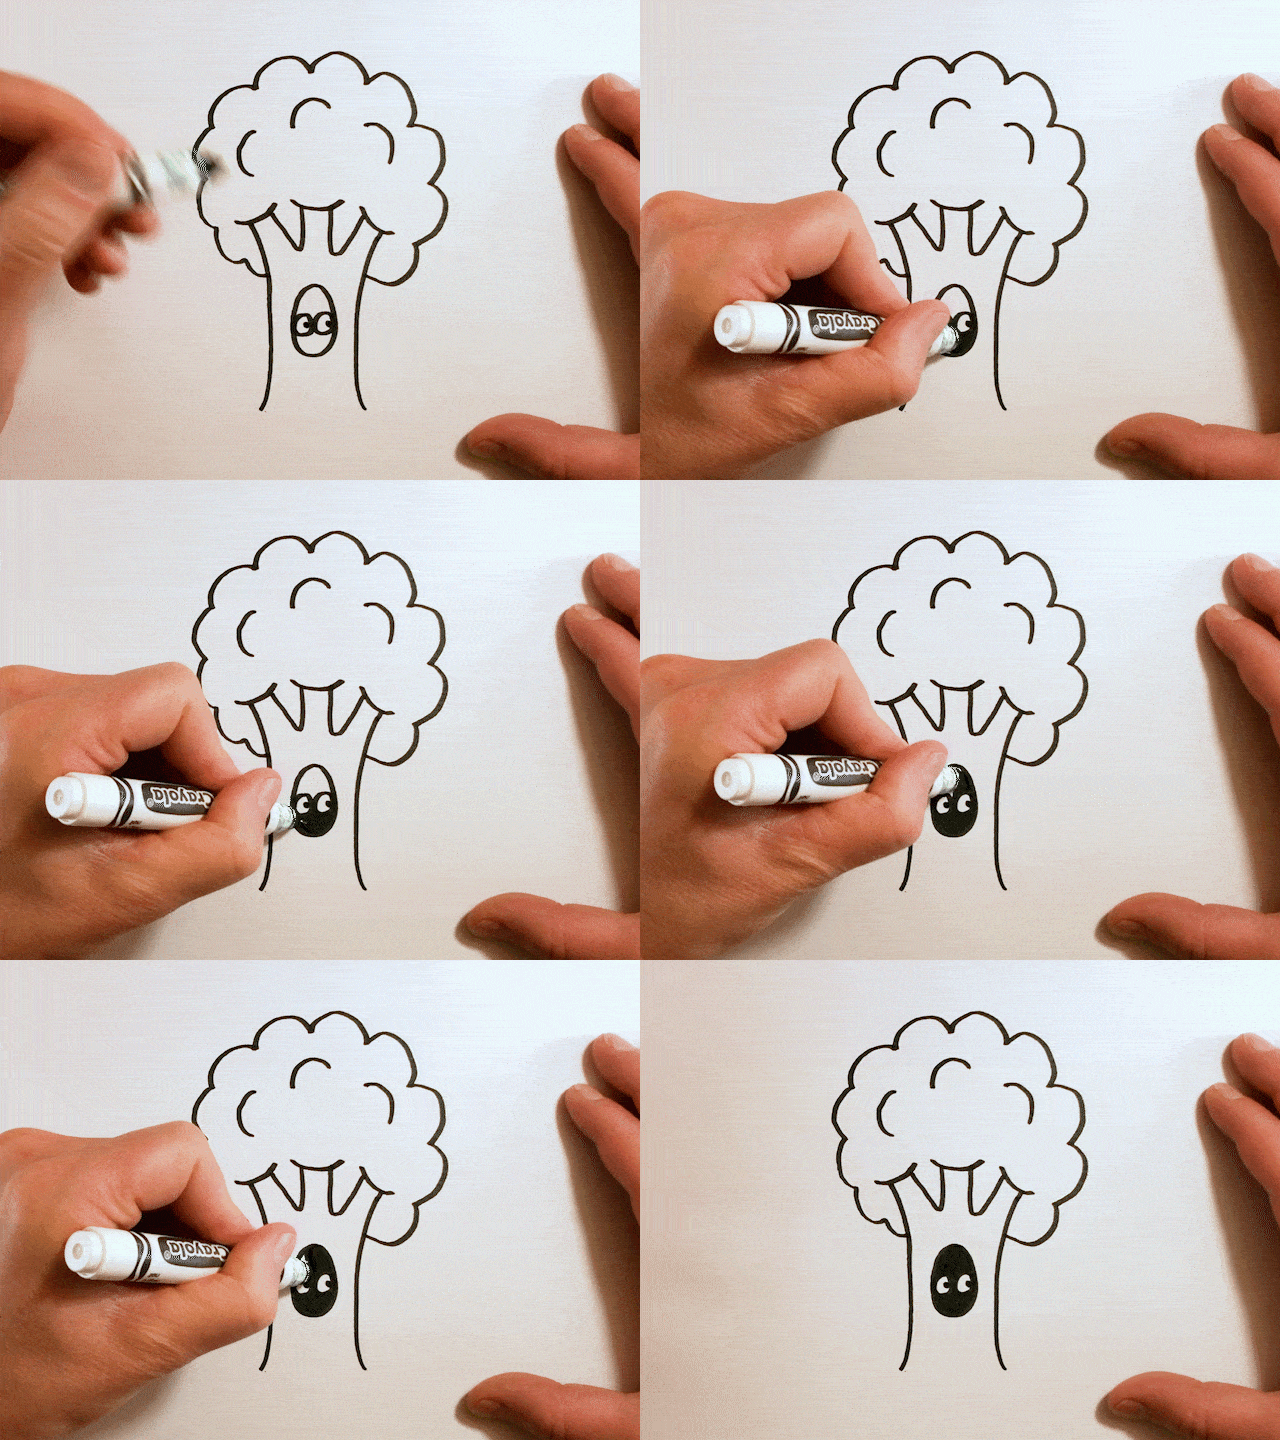
- Finish drawing the leaves of the cartoon tree. This is done by drawing a bubbly line from one side of the tree trunk up and around and then connecting back to the other side of the trunk. Add a few more curved lines in the leaf area to make it look bushier.
- Next draw a hole in the tree trunk. Draw an oval or circle in the middle of the tree trunk, and then add some eyes for a little critter staring out.
- Finish the hole by filling in the circle except for the eyes.
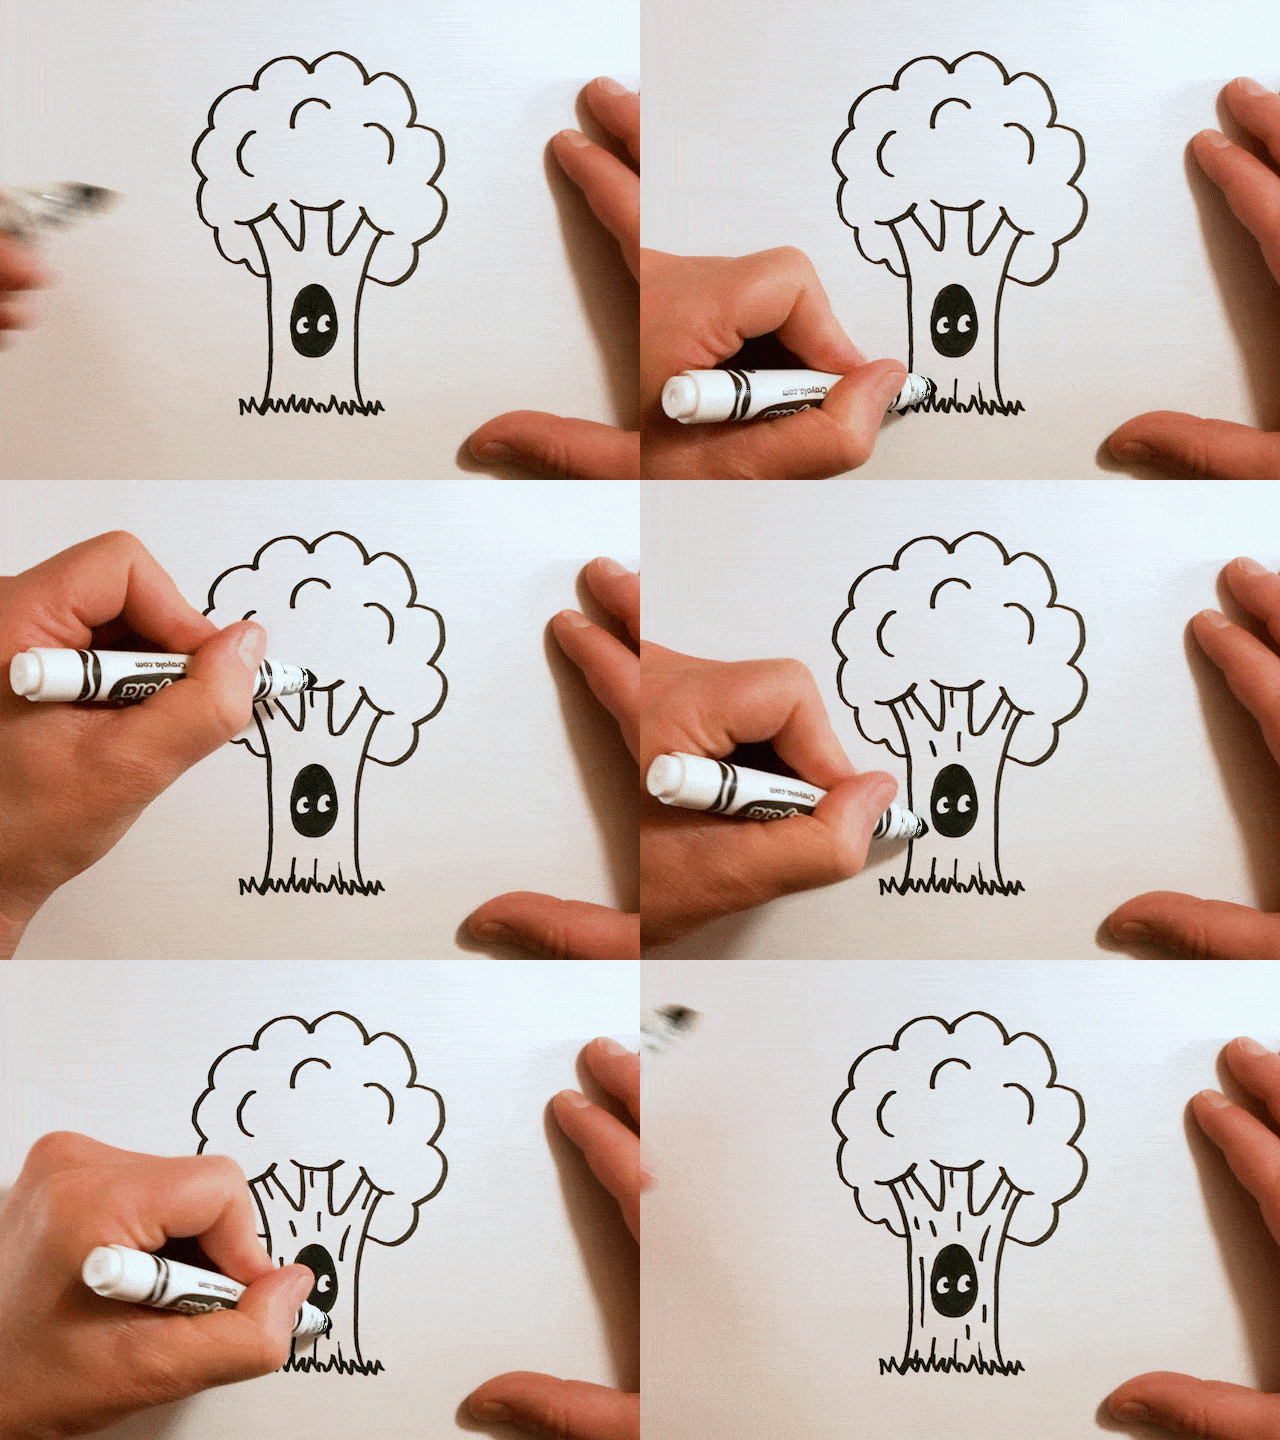
- Draw some grass under the cartoon tree. Just draw a zig-zagged line under the tree trunk.
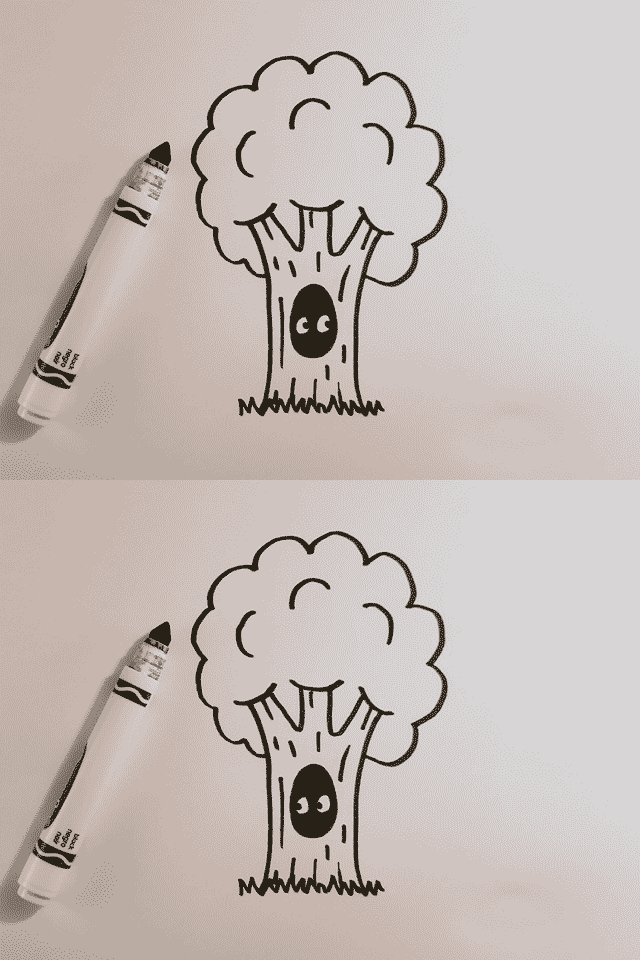
- Finally add some vertical lines to give the trunk some bark texture.
That’s it. Cool tree! 🌳


